Advanced Malting Tutorial
Gluten Free Home Brewing offers the largest variety of malted grains. Shop Our Store to buy malt for your recipe.
Gluten Free Malting
by Andrew Lavery
If you want to make decent gluten free beer there's two things you will have to learn; how to make good malt, and how to do a full decoction mash. In this article I will deal with the first issue, making good quality malt.
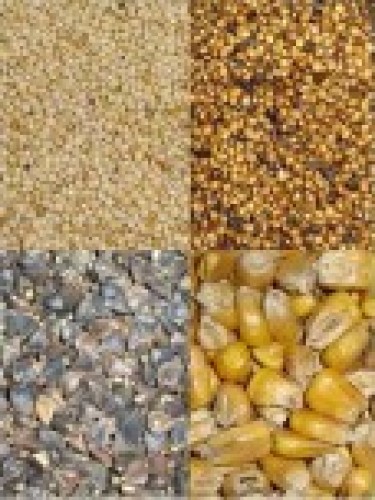
Any of the main gluten free grains can be used to make malt, each one having advantages and disadvantages. I have malted and brewed with sorghum, millet, maize and rice as well as the pseudo cereal buckwheat. I will cover specific procedures for millet, buckwheat and maize as we go, but will leave out sorghum as it is covered elsewhere, and rice as malting it did not give good results.
But before we start making malt we must first have something to make it with, so there is some equipment to be sourced and some equipment to be constructed. Spending money and building stuff, all part of the hobby.
Firstly though I will give a brief description of the malting process which will then lead us into the equipment we will require and specific instructions.
Malting Process
The malting process can be broken down into five distinct stages:
-
Steeping - grain is soaked in water to start seed growth.
-
Germination - grain enters growth phase, developing enzymes.
-
Kilning - germination halted by drying, while preserving enzymes.
-
Cleaning - roots and shoots removed from malt.
-
Roasting - malt roasted to develop flavour and colour.
Steeping
During steeping the grain is soaked in water to raise the moisture content from around 12% up to 35-50%, depending on the grain. Increasing the moisture content wakes the grain up from dormancy and starts the process of growth. Air rests, or bubbling of air into the steep water, can also be used during steeping to help increase water take up and remove CO2. The temperature of the steep water affects the degree of water take up and is important in achieving optimal enzyme development.
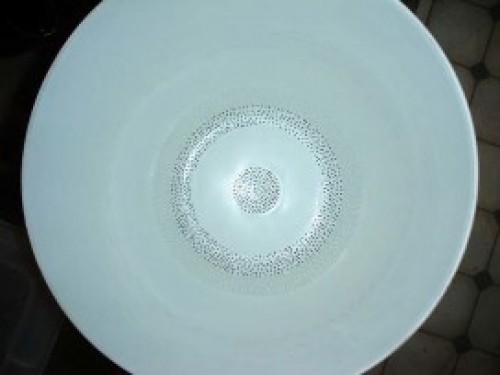
My setup for steeping gives me good control 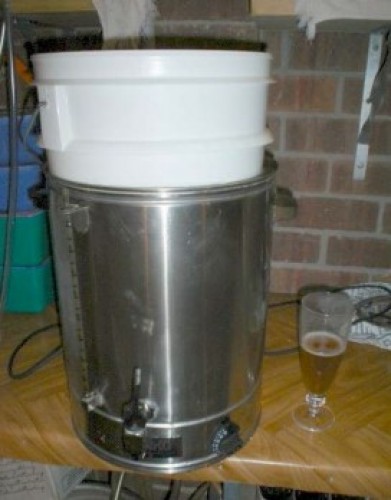 over the temperature,this is important as a difference of 5C in steeping can make an impact on the quality of the malt produced. I use a 20 litre plastic bucket which I have drilled holes in the bottom of to hold the grain. The holes allow the water to flow in and out, so the grain can stay in the bucket between steeps. They are also small enough that the millet does not fall through.
This bucket is placed in a 20 litre urn and filled with water; the urn has a thermostat so it is easy to maintain a constant temperature. A similar setup could be constructed using a large container of water with a fish tank heater in it, if you don't have an urn.
The size of the grain being malted has a large impact on the time required for steeping. A small grain like millet absorbs moisture very quickly while a large grain like maize takes much longer.
The natural germination temperature of the grain will influence the optimum steeping temperature. A tropical grain like millet requires a high steep temperature while temperate grains like buckwheat malt better at a lower temperature.
Typical steeping programs I have used that have been successful are shown in the following table.
|
Millet |
Buckwheat |
Maize |
||||
|
Time (hr) |
Temp (C) |
Time (hr) |
Temp (C) |
Time (hr) |
Temp (C) |
|
|
Steep |
8 |
25 |
8 |
20 |
9 |
25 |
|
Air Rest |
2 |
25 |
2 |
20 |
3 |
25 |
|
Steep |
8 |
25 |
8 |
20 |
9 |
25 |
|
Air Rest |
2 |
25 |
2 |
20 |
3 |
25 |
|
Steep |
4 |
30 |
4 |
25 |
9 |
25 |
|
Air Rest |
- |
- |
- |
- |
3 |
25 |
|
Steep |
- |
- |
- |
- |
9 |
30 |
The moisture content of the grain should be around 12% to start with, and by the end of the above steeping schedule it would reach around 35% for millet, 48% for buckwheat and 40% for maize. And don't fill the bucket to the top with grain as it expands as it soaks up water, millet will swell about 30% and buckwheat and maize about 65%.
Germination
After the desired moisture content has been reached the grain is removed from the steep and kept in a dark, humid, environment to germinate. During germination the grain starts to grow, breaking down the grain structure and developing the enzymes required for brewing.
The grain should be rinsed and turned every 12 hours to maintain the moisture content, remove heat built up during germination, and break up any matted rootlets. This is more of a problem with millet as the small grains are tightly packed restricting airflow. When germination is starting to speed up after 36 hours the temperature can accelerate to 40C if the grain is not cooled and turned.
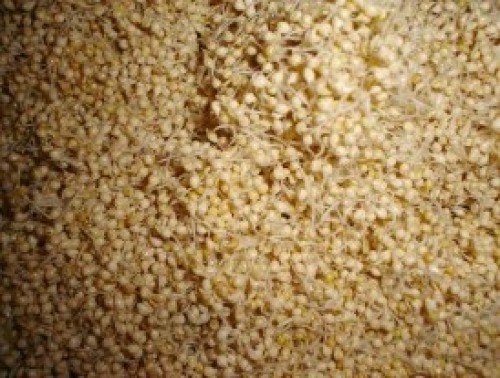
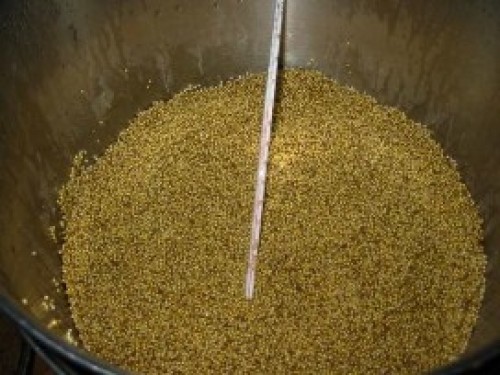
Don't leave the grain too wet and warm as fungus will start growing, particularly at temperatures above 30C. After the grain has germinated sufficiently, as a rule of thumb for gluten free grains it is when the shoot (not root) has grown to about twice the grain length, it is then ready for kilning. Some germinated millet is shown in this picture.
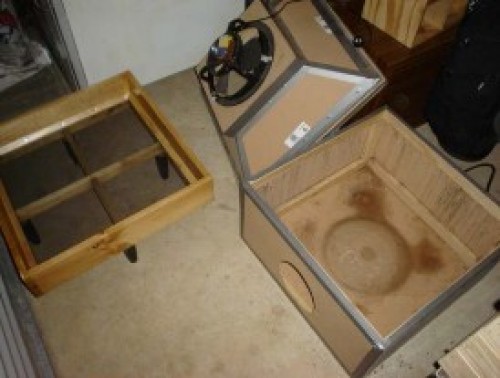
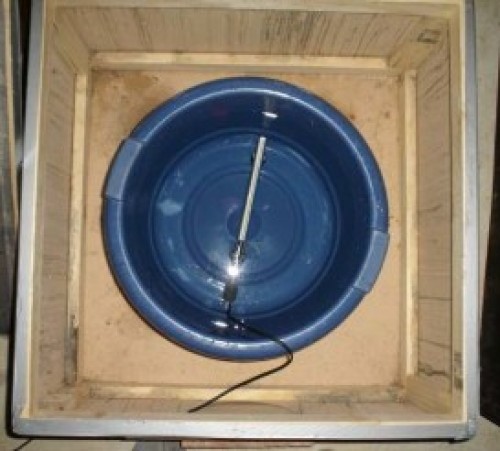
For germination I have constructed a dual purpose unit that also acts as the kiln. It is constructed out of pine, MDF and flywire screen and has three components; the base, the tray, and the fan.
For germination the setup used is to place a tub of warm water in the base, there is a fish tank heater in it that can be set from 18-32C. This tub provides warmth and moisture, a coastal effect in essence. The warm water reduces temperature fluctuation and keeps the humidity up.
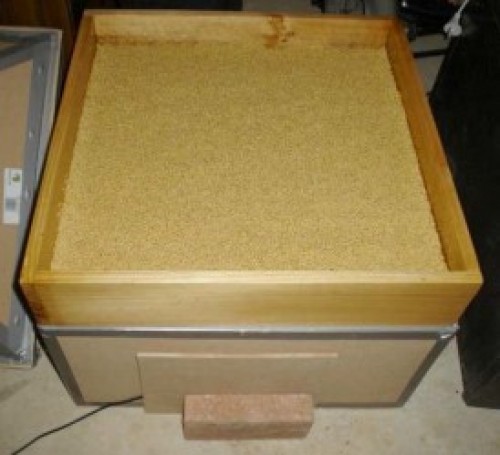
The tray, which has been sealed to prevent fungal growth, is then placed on the base and filled with the steeped grain. Again it is important that the tray is not filled to the top as the grain will expand once it germinates and is turned. My tray has a volume of about 30 litres and can handle a 10 kg batch of millet.

I place a temperature sensor into the grain bed and then put an old blanket over the tray to keep the heat in. The thermometer is an indoor/outdoor unit and it is showing 27C in the germinator and 14C in the garage so it is working nicely. These also keep a record of the maximum and minimum so you can check how well temperature fluctuations are being reduced.
Typical germination programs I have used that have been successful are shown in the following table. Don't worry too much if your temperature is a bit off, it will just take longer if it is a bit low or be quicker if it is a bit high.
|
Grain |
Germination Time (hrs) |
Germination Temp (C) |
|
Millet |
48 |
30 ± 3 |
|
Buckwheat |
60 |
20 ± 3 |
|
Maize |
96 |
25 ± 3 |
Kilning
The next step is kilning, this is the process of drying the grain with high airflow at a low temperature to stop grain respiration and bring the moisture content down to 4-6%. The grain will be sufficiently kilned when the root and shoot have both withered up. At this stage we have our pale base malt which will have sufficient enzymic strength but little colour and a distinctive but mild flavour.
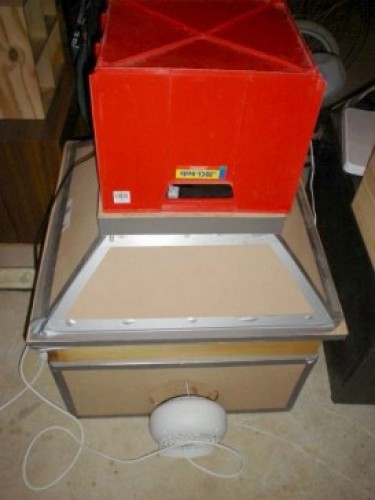
To start kilning it is a simple process of converting the germinator into a kiln. Pull the germinator apart so you can get the tub of water out from the base, then place the tray back onto the base. Place the fan unit on top and I put a crate over it to keep little fingers out. The fan is a standard bathroom exhaust fan from the hardware store and is relatively safe as the blade will stop easily if something, like fingers, gets in the way.
Heat is provided by a 1,100 W blower fan that blows warm air into the base under the grain, the extraction fan sucks the warm air up through the malt. By varying the distance from the fan to the opening in the base the "air on" temperature can beadjusted - very scientific. The temperature sensor is placed under the tray to monitor the air on temperature while I place the "indoor" part of the monitor in the 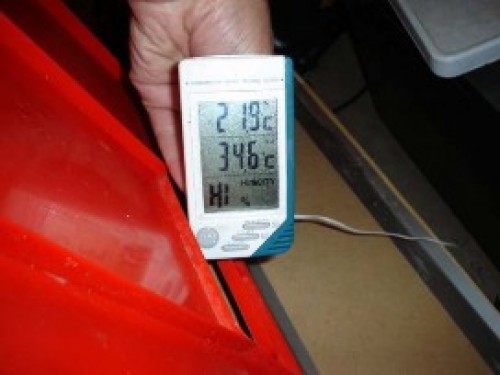 airstream flowing out of the kiln.
As you can see in the picture, the unit is measuring an air on temperature of 35C and air out temperature of 22C at high humidity (>80%). As the malt dries the temperature of the outflow will rise and the humidity will fall to 20-30% by the time it's done.
Typical kilning temperatures I use are to start at 35C and ramp up to 45C over the kilning time period. For a kiln full of malt the time required is typically 12 hours for millet, 24 hours for buckwheat and 48 hours for maize, smaller batches will be done quicker.
Cleaning

The dried up roots and shoots then need to be broken off and separated from the malt as they easily absorb water, have a high protein content, bitter flavour, and are generally bad for beer quality. It is easier to remove the roots and shoots while the malt is still warm.
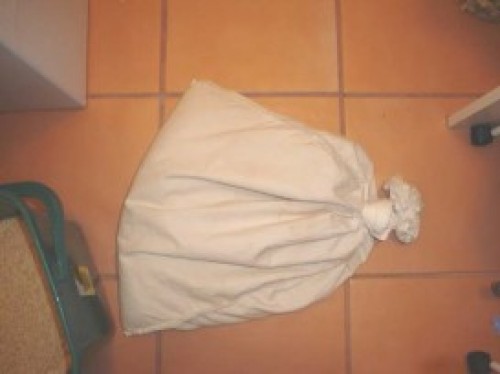
The best way I have found the break them off is to put the malt into a cotton pillow case cover, zip it up AND tie a knot in it- learnt that the hard way, and put it in the tumble drier for 5-10 minutes. Our drier is a 3.5 kg capacity so I only put 2.5-3.0 kg in the bag, and make sure there is free space in the bag so the grain can tumble and move about. Also run it on the cool down cycle if your drier has one so you don't overheat the grain.
The next issue is to separate the malted grains from the roots and shoots, for buckwheat and maize this is relatively simple and can be done using a coarse sieve and some elbow grease. The method does not work with millet as both the roots and the grains fall through the sieve making separation near impossible, the resultant roots and shoots in the mash have an unmistakable odour.
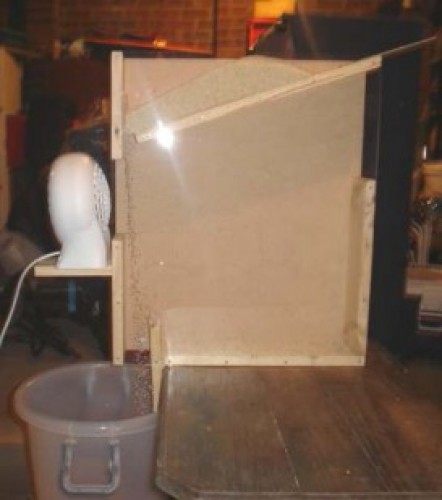
It was then that I had a brainwave and decided to construct the Aerodynamic Roots and Shoots Extractor which has made the process of removing the waste product an easy one for any type of malt (think about the acronym, very apt).
Basically the grain is allowed to flow down past the blower fan, the heavier grains are deflected a small amount and fall through to the bucket, but the roots and shoots are blown past the splitter post and end up being retained in the cavity.
The close up photo shows the roots and shoots being blow further than the grain.
The efficiency of the separation can be adjusted by moving the splitter post. I run a very clean cut first to recover the bulk of the malt then put that malt aside. I then take the rejects from this first cut and process it with the splitter moved to a position to give high malt recovery but some roots and shoots and then recycling the grain through until it is fairly clean.
At the end of the process we can calculate the malting loss, the difference between the amount of grain we started with and the amount of clean base malt we have at the end. For millet the malting loss averages around 10%, 12% for buckwheat, and 15% for maize.
Roasting
So now we have our pale base malt, it will be the backbone of our beer due to its good enzymic strength. However, pale malt on its own will only provide limited colour to our beer, a straw colour, as it only has a colour rating of around 1°L. To create darker beers and beers with more complex flavours we need darker malts with more colour and flavour.
All your roasting requirements can be done in the kitchen oven (fan forced preferably), as long as you have an understanding partner. A warning though, roasting malt to a very dark colour such as chocolate can leave a burnt smell hanging around the kitchen for a couple of weeks.
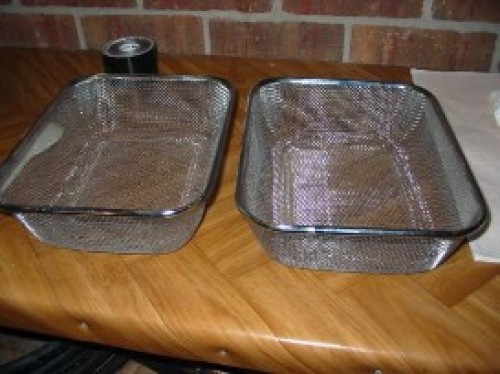
The ideal tray for roasting grains is a stainless basket as shown in the photo below; the open basket allows better circulation of heat and more even roasting. I picked these up for around $5 each.
When roasting sorghum to make chocolate malt it is advisable to use a solid baking pan as the sorghum tends to liquefy at temperatures around 200- 250C, millet malt due to it's small size also needs to be roasted in a solid baking pan.
Another essential piece of equipment is an over thermometer to ensure you are hitting the right temperature, the temperature dial on my oven only has 25C increments and those wore off long ago.
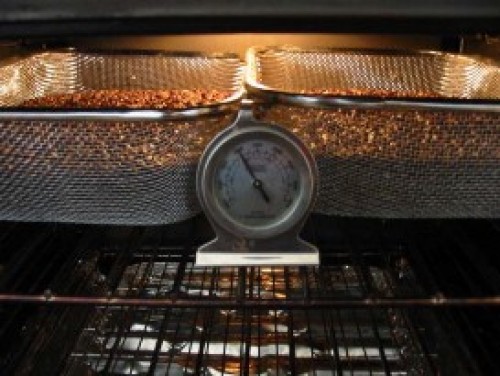
The photo shows some buckwheat malt being roasted to make Munich malt, a lovely nutty aroma, and the dial though hard to see in the photo shows 150C.
In order to get consistent results it is also a good idea to roast the same quantity of grain each time you do it, I do 1.0 kg per tray.
So what temperatures for roasting? In the following table are the times and temperatures I use to make my roasted malts. As you can see I have not roasted maize, not sure if I would want a roasted corn taste in my beer.
|
Malt |
Type |
Potential Extract |
Colour(°L) |
Time (min) |
Temperature |
|
Millet |
Pale |
1.031 |
1 |
- |
- |
|
Vienna |
3 |
120 |
100C |
||
|
Munich |
1.029 |
20 |
120 |
150C |
|
|
Chocolate |
1.027 |
250 |
120* |
200C |
|
|
Crystal |
1.025 |
75 |
see next section |
||
|
Buckwheat |
Pale |
1.032 |
1 |
- |
- |
|
Munich |
15 |
120 |
150C |
||
|
Maize |
Pale |
1.032 |
1 |
- |
- |
|
Sorghum |
Chocolate |
1.032 |
250-300 |
120* |
200C |
My process is to get the oven up to the required temperature and then put the malt in, so it will take a little while to get the malt to warm up. I take it out and give it a quick stir every 30 minutes. The time for the chocolate malt is flexible as it really depends on how much smoke you can handle, and how much flak you are willing to cop for the next couple of weeks by every person entering the kitchen.
The potential extract figures are determined using the standard EBC method outlined in Robert's articles and are quoted on an "as is, fine grind basis". The figures for the malts that cannot fully convert themselves have been determined using some added amylase enzymes in the test mash.
Crystal Malt (of sorts)
Still not satisfied with the flavour and body of you beer? Then come along to the advanced class for home malting. Most "normal" beer recipes call for at least one type of crystal or caramel malt to enhance the colour, flavour, aroma and mouth feel of the beer.
There is a view that these types of malts are out of the reach of gluten free brewers due to the high gelatinisation temperature of the gluten free grains. While true crystal malt may not be possible, partial crystal malt can be made.
The reason being that there is a transition temperature where some of the starch becomes gelatinised while the amylase enzymes are still active, if we target this temperature range and move slowly through it we will convert a proportion of the starches to sugar and create a partial crystal malt. I have only tried this with millet malt as it has the lowest gelatinisation temperature of the gluten free grains, and also has the highest diastatic power.
So how do we do it? Firstly you will need a thermostat controlled urn or low temperature oven to enable you to hold a steady temperature for long periods of time. I use a stockpot sitting in an urn used as a water bath.
The general process is as follows:
-
Soak pale millet malt overnight in 30C water to re-hydrate
-
Drain and rinse the wet malt and place in the stock pot, stir every 30 min
-
Raise the temperature to 70C and hold for 3 hrs to breakdown starch
-
Remove from stock pot and place in baking pan
-
Roast at 75C until malt is dry
-
Roast at 150C for 2 hours
The photo opposite shows the millet malt darkening during the 70C rest. It also starts to smell sweet and malty as it converts.
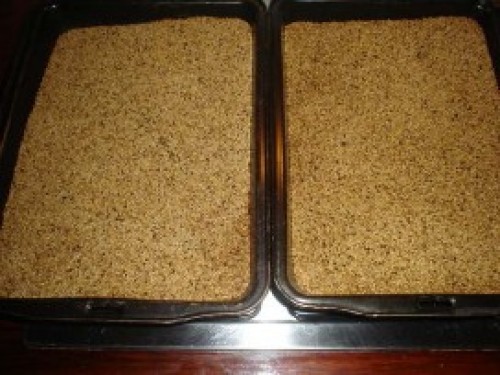
And in the next photo we see it out of the oven after drying, there is some burnt grains in there but not too much to be a concern for dark beers.
This makes very nice partial crystal malt with a colour rating of around 75°L, from judging comments I have received the flavours are reminiscent of traditional CaraMunich. The reason I term it a partial crystal - if it is steeped in hot water it has a potential extract of 1.010, however, if it is mashed with pale malt (or amylase enzymes) the potential extract is 1.025.
This malt is very good in darker beers and tasty English ales but can come across with a slightly burnt flavour if used in a lager or American pale ale to adjust colour. The reason is that the sugary wet malt in a roasting pan sticks to the metal resulting in uneven roasting and some burnt sugar/malt. For use in pale beers do the final roasting at 100C to minimise burning.
The Final Word
Just about anything is possible if you put the effort in.
My favourite beer that I make is my hirsebier (hirse is German for millet), made from a combination of pale, Munich and crystal millet malts, tettnang hops and German ale yeast.
It took out third place in the wheat beer category of Vicbrew 2005, the Victorian state championships, entered as a "normal" dunkelweizen and not known to be gluten free by the judges. And the main thing it lost marks for was low yeast phenols and esters, not strange malt flavours! Second and third evolutions of this recipe also scored well at; Beerfest 2006 as an incognito roggenbier in the specialty section, and took a second place at Thirroul 2006 as a Millet dunkelweizen in the specialty section.
I truly believe that gluten free beer can be made to taste as good, if not better, than "normal" beer. Of course it will always have its own distinctive taste, but with a range of well made malts in the mash it can hold it's own in the world of craft brewed beer.
And getting the right combination of malts in the mash is one of the key steps to producing a beer you will want to brew again, and again.
Cheers, Andrew Lavery
Eureka Brewing
© Eureka Brewing 2006.
Also read our August 2018 blog 'Catching up with Andrew Lavery'